I had set up a search request for the Yaesu FT-736R on kleinanzeigen.de. In July 2024, the alarm went off: In Soltau, a device in unknown condition was offered from an estate for €200. I could see from the pictures that it even had the 23cm module installed. I went for it. But would the device work?
Purchase for sentimental reasons – and because the device is a legend
When I started to take a closer look at amateur radio myself and to get my licence, I stumbled across the FT-736R on the Internet while searching for my parents’ old equipment. Although I couldn’t find this device in any old pictures of my parents’ shack, it somehow looked familiar to me. I still don’t know where it came from. It’s quite possible that it used to be in Dieter’s (DL7XPY/SK) shop or in DF0ZM’s old club station in Minden. I really wanted this little treasure in my shack.
The device has a modular design and the standard version was always supplied with the 2 m band and the 70 cm band module.
There are modules for retrofitting for the 23 m band, the 6 m band and for 220 MHz. In addition, various optional modules can be installed in the device to equip it with CTCSS tones, a keyer or a CW narrowband filter, for example.
With 25W output power, the device is ideally equipped for local rounds on repeaters and club frequencies. In the basic version, a 1750 Hz burst allows most repeaters to be opened.
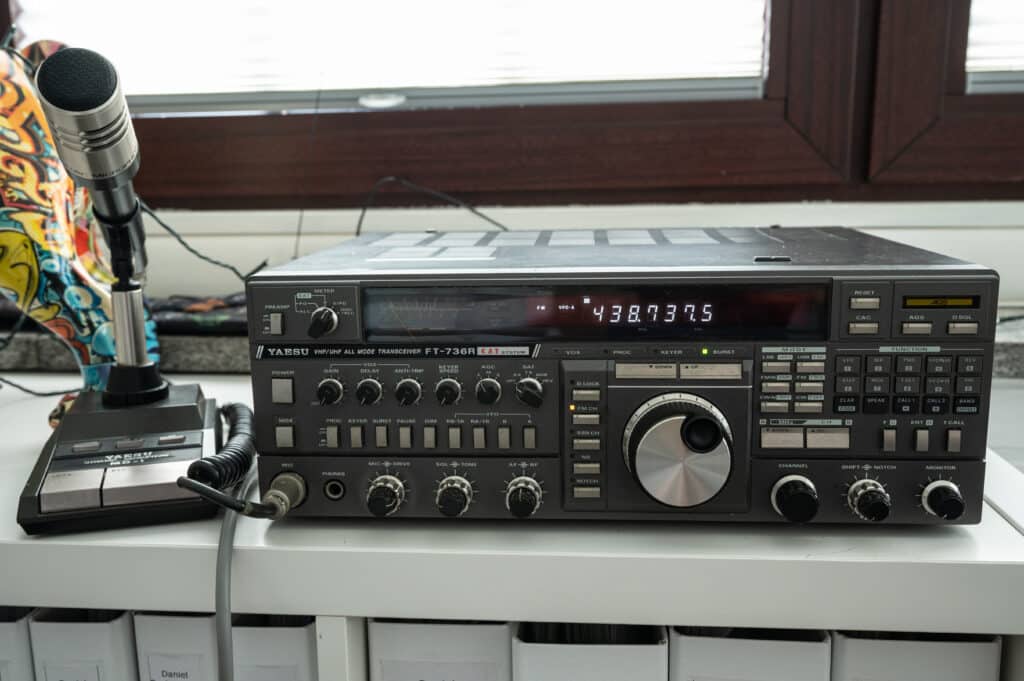
Very exciting is the fact that the device contains two separate modules for 2m and 70cm, which operate completely independently of each other. This enables reception on one band while transmitting on the other – a feature that makes the device particularly suitable for operation with amateur radio satellites in order to compensate for the Doppler effect and perform duplex operation. A legendary piece of technology despite being 35 years old – just like myself. 🙂
The exact specifications of the device can be found here: https://www.rigpix.com/yaesu/ft736r.htm
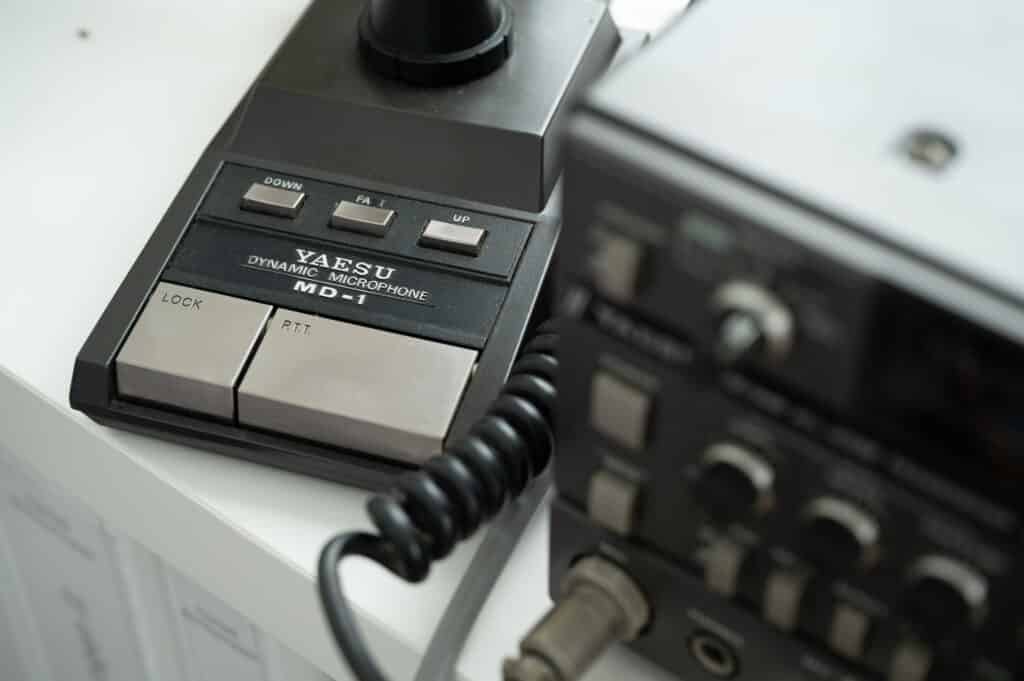
I was able to purchase the high-quality Yaesu MD-1 for an additional 80 euros. The microphone clamp at the top was broken in two places, but I was able to glue it so well with superglue that the microphone can now be inserted back into the holder under pressure.
Does everything work? What is installed?
Some of the buttons on the front had signs of oxidation. This could be easily cleaned with a Q-tip and some methylated spirits. Would the oxidation continue on the inside?
After switching on, I was initially disillusioned:
The buttons on the right-hand side of the device somehow don’t work reliably. The frequency selector and the channel selector wheel are grumpy. Either the operating frequency moves in the wrong direction or jumps back and forth randomly when you use the two rotary controls. The rotary encoders are probably worn or dirty. This does not affect the use of the radio. The frequency can also be set using the buttons on the microphone or on the radio itself.
I took the device apart once. After removing the housing, I was able to fold down the front flap and take a look inside the radio.
I realised that there was no oxidation on the circuit boards. Unfortunately, there is no FTS-8 module installed which can encode and decode CTCSS tones from 67Hz to 250.3 Hz. No matter, you can retrofit a corresponding module: https://shop.elcon.ch/ctcss-de-encoder/ctcss-encoder-yaesu-fts-8-ersatz.htm
What is particularly intriguing, however, is that you can set the CTCSS tones in the Tone menu by pressing the T.Set button, despite the lack of a module.
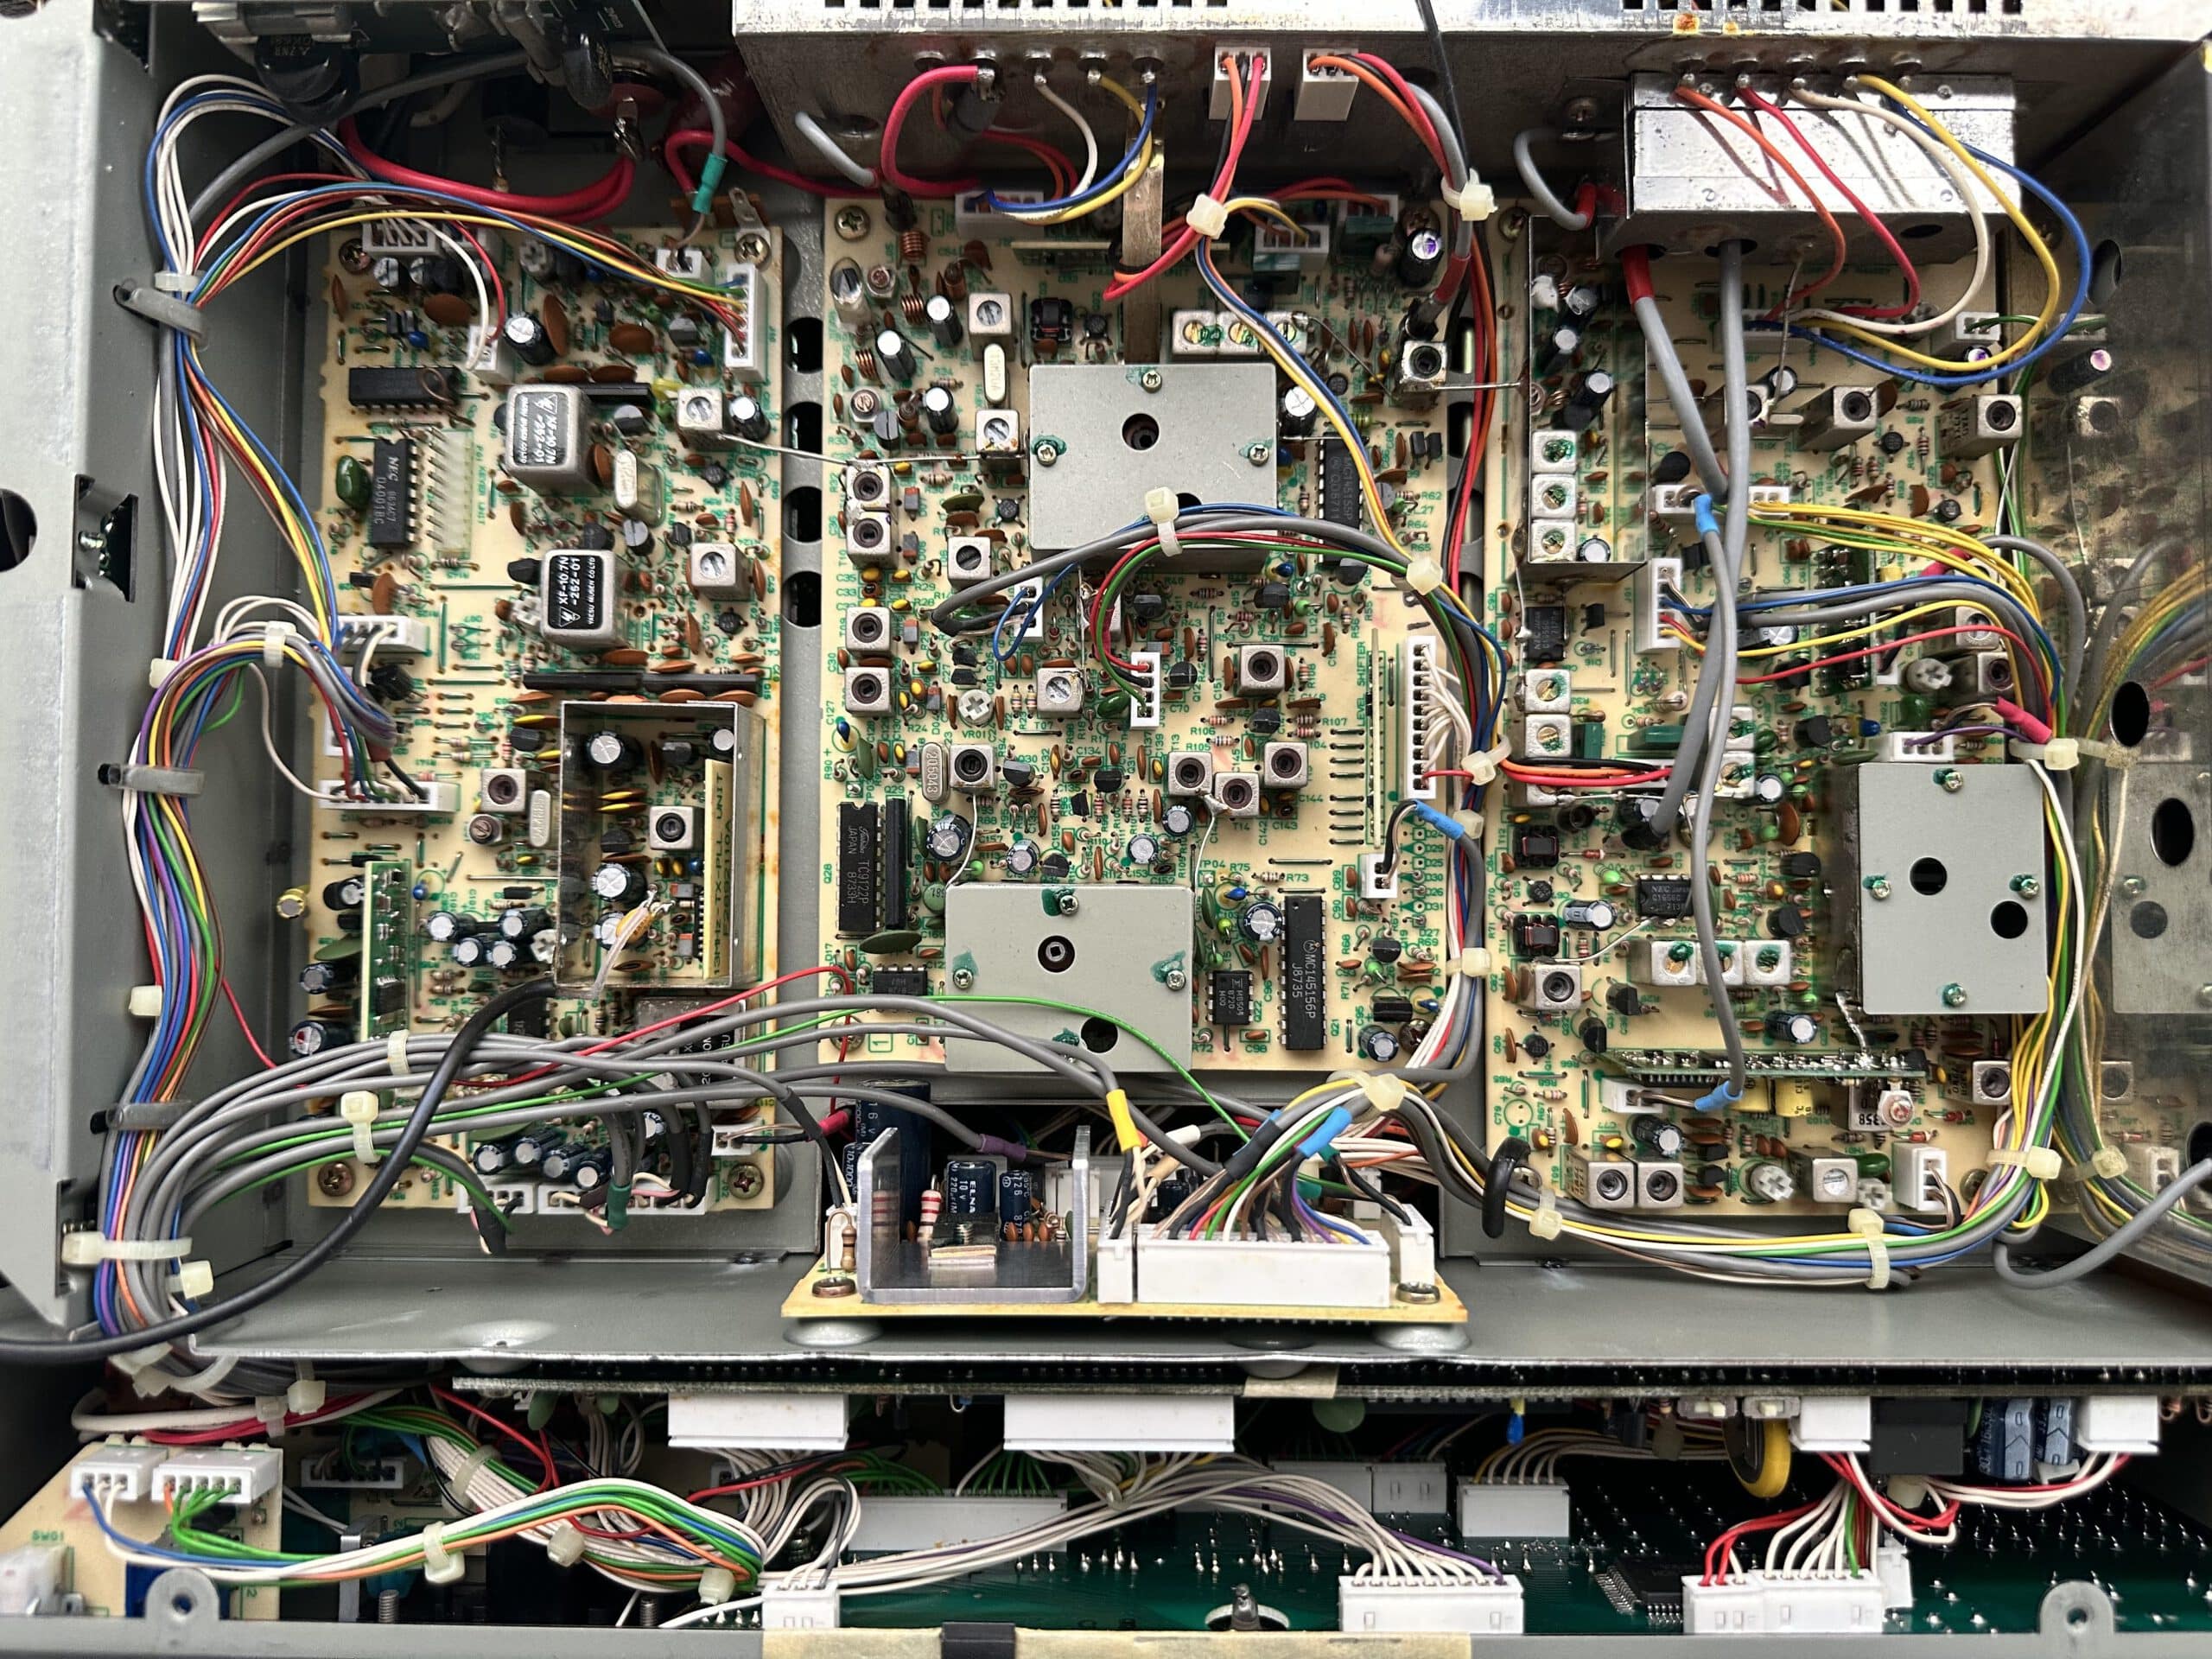
It also turned out that neither a keyer nor the CW filter was installed. That’s OK for me.
I checked all the connectors to the buttons on the front panel. Although I couldn’t find any obviously loose contacts, all the buttons on the front worked again after reassembly. Perhaps something had come loose on the car journey from Soltau.
I’ll have to take care of the rotary controls at some point. Maybe I’ll try compressed air first and then get some help to replace the partially optical rotary encoders.
After an initial test on the OV frequency with DO5SST and DH2CT, I could safely say that the device transmitted cleanly and with good audio on 2m and 70cm. In the first test with my small mobile antenna, however, I was a little deaf on 70cm. Let’s see if that changes when connected to the Diamond X5000.
Repair of the VFO rotary control (optical encoder)
The large VFO rotary wheel is located in an optical encoder. So don’t use contact spray here!
I first opened the housing and removed the rubber band from the knob on the front panel. Then you can loosen a grub screw underneath to remove the knob from the front panel. A nut can be seen on the front, which can be loosened to remove the rotary encoder. The rotary encoder is only held on the front by this nut.
I then tried the ‘hammering’ method. I pretty much abused the encoder with the back of a screwdriver. I couldn’t believe it. But the behaviour of the button got better after that. Better, but not good enough, so I kept going:
I folded down the front panel and removed the complete encoder and opened the encoder by loosening the four screws (one of them didn’t want to come loose, so I had to drill it out – 3 screws should be enough anyway).
Open the encoder housing very carefully: there is an encoder wheel inside, which sits between the optical unit. We open the housing by pulling the back plate out of the side of the housing. Otherwise we will damage the wheel.
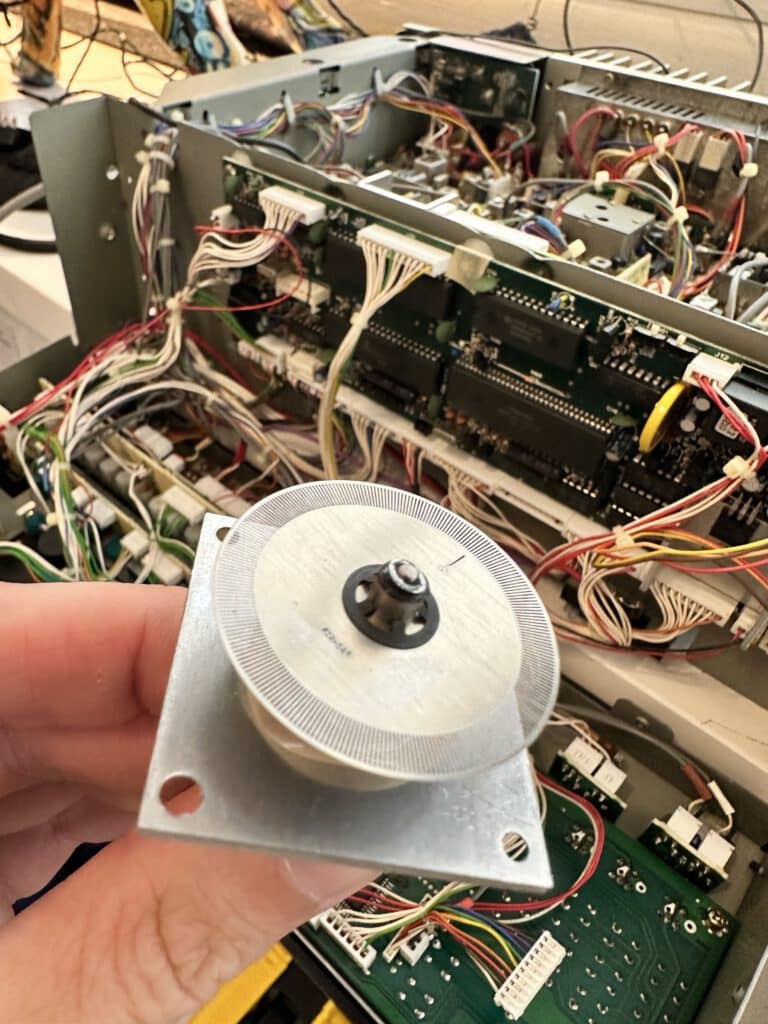
Now it’s time for compressed air from the can. Both the optical unit and the optical wheel were well blown through. I then used some glass cleaner on a cotton bud and cleaned both sides of the wheel and the inside of the optical unit.
To remove any cotton residue -> another good blast of compressed air.
There are a few lubricants in the housing, perhaps vapours have formed that have settled on the wheel. I also noticed that some of the black lubricant had run down the axle, so I cleaned that off too. It could be that this was somehow reflected in the optical unit.
The behaviour of the rotary knob has improved by 95%. Sometimes it still skips a number, but now I can use it to turn the VFO up and down <- wasn’t possible before. I can easily set a frequency with the knob, even though it sometimes skips a number after the decimal point.
I’ll see if the repair is permanent. If not, I will have to replace the encoder with another third party brand encoder, so memo to self:
NIDEC-COPAL electronics – Requires shaft extension
Shaft diameter: 6mm, shaft length: 22mm
RMS20-256-201-1 256 steps
RMS20-250-201-1 250 steps
Alternative
Bournes Pro Audio – Requires extension of the knob
Shaft Ø: 0.25-in, shaft length: 0.875-in
ENS1J-B28-L00256L-ND 256 steps
There is also a video of a guy using a Kenwood part:
https://www.youtube.com/watch?v=B8Vgzw5O0PY&t=637s
https://www.youtube.com/watch?v=AuzCllwK8E4
Unknown modification by the former owner
DB9XJ/SK, the OM who previously owned this radio, was a radio and television technician according to his relatives. It can therefore be assumed that Joachim knew what he was doing. There are retrofitted connections on the back of the radio, the function of which I have not yet been able to find out. The used radio also came with two banana plugs.
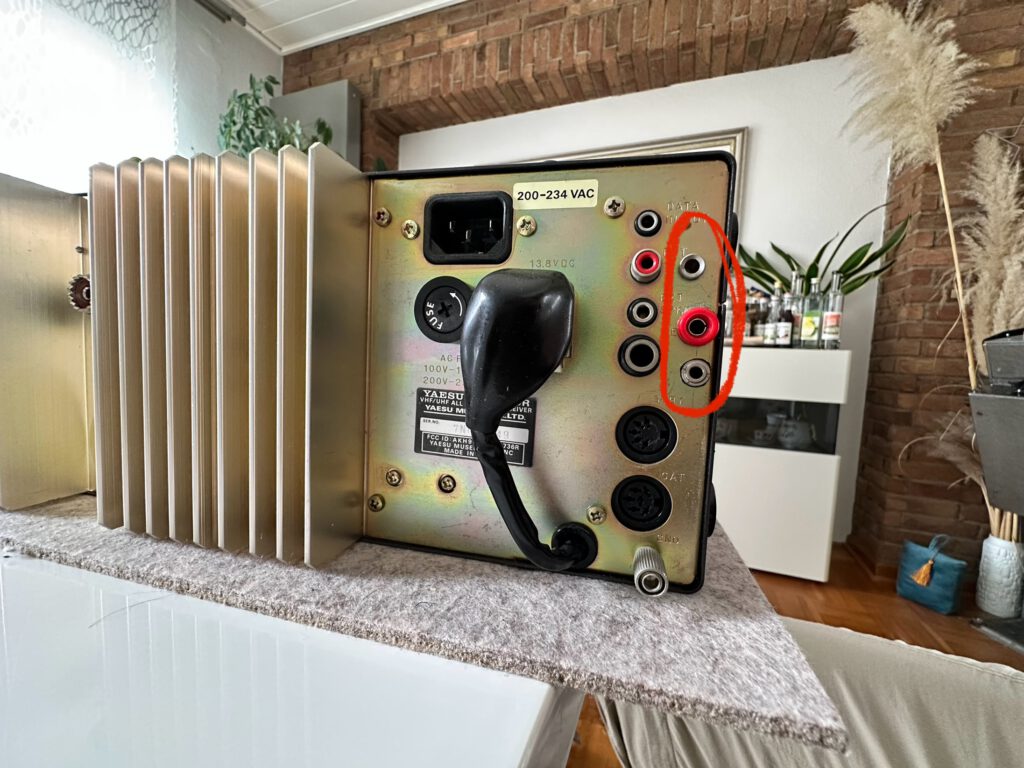
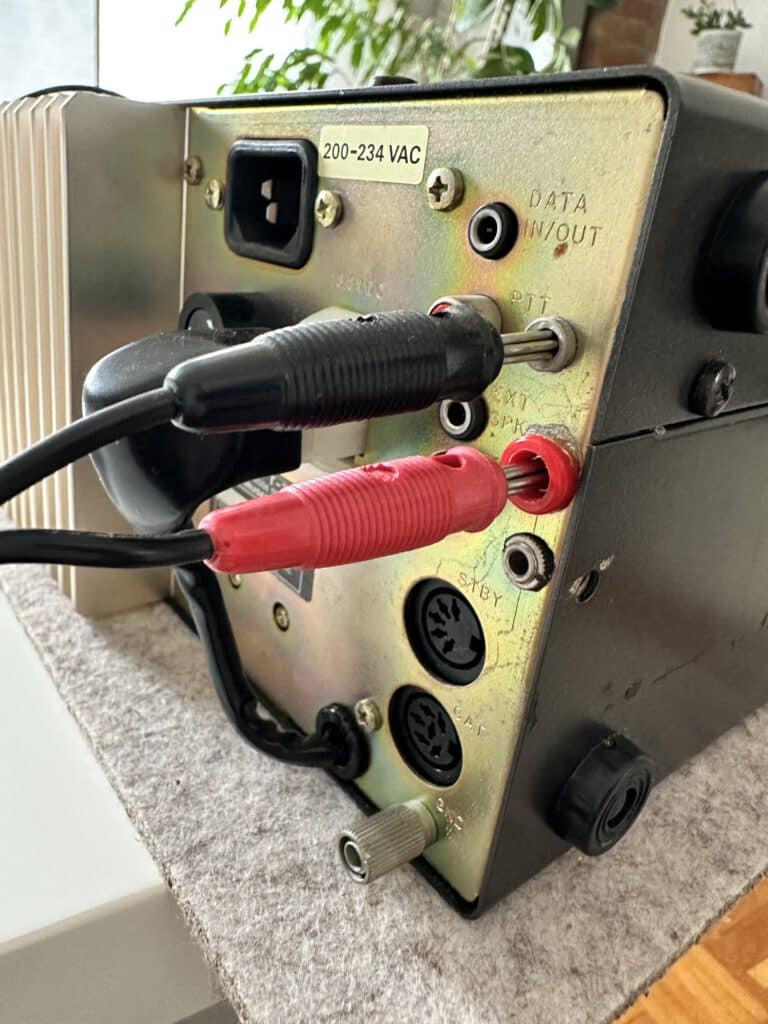
I’ll have to take a closer look at this modification. I suspect an external loudspeaker connection or an external/parallel PTT.